Introduction
There have been some great guides through the years on configuring WSUS with SCCM from the ground up, but I felt it was time for me to add to the library with an updated version to cover Server 2016, and particularly my personal recommendations for a successful A-Z setup.
In Part I, I’ll take you through configuring the required Server Roles & Features, WSUS Installation and Configuration, IIS settings, Folder Permissions and linking it all up into SCCM.
In Part II, I’ll cover actually deploying the updates via ADR’s & Baselines.
In Part III, I’ll cover Client Settings, Maintenance Windows, Group Policy configuration and HTTPS.
In this guide I’ll be configuring WSUS on the same local Server as the Primary Site & SQL Database.
Pre-Read Material
I’d advise you read the following Microsoft documentation prior to installation:
https://docs.microsoft.com/en-us/sccm/core/plan-design/configs/site-and-site-system-prerequisites
https://docs.microsoft.com/en-us/sccm/sum/plan-design/plan-for-software-updates
Installation
Because this is already a Primary Server, certain roles are already installed.
Required roles:
Software update point
Windows Server roles and features:
- .NET Framework 3.5 SP1 (or later)
- .NET Framework 4.5.2
The default IIS configuration is required.
Windows Server Update Services:
- You must install the Windows server role Windows Server Update Services on a computer before installing a software update point.
Open Server Manager>Manage>Add Roles & Features
Tick Windows Server Update Services

Under Features, ensure the default .Net Framework 3.5 and 4.6 have been ticked.

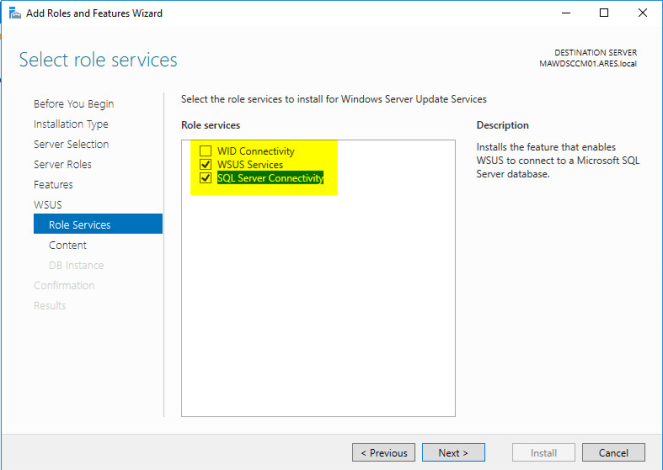
We’re going to connect to the SQL Database. Ensure you untick “WID Connectivity”, and select “WSUS Services” & “SQL Server Connectivity”.
Here we need to configure where WSUS will create its directory.
I’ll be storing it on a separate drive in a WSUS folder.

Enter the FQDN of your SQL Server and click Check Connection.

Wait until it confirms a Successful Connection prior to continuing.

Once you’ve confirmed your configuration, Select Install.

Wait for installation to take place..

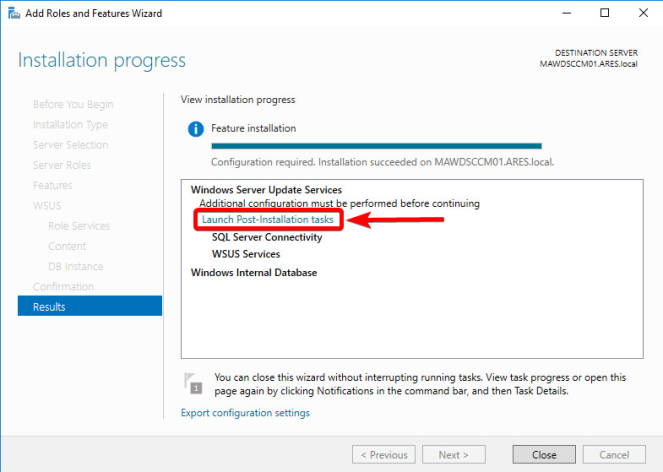
Once the initial configuration has been complete you will be prompted to “Launch Post-Installation Tasks”.
Select this link..
Wait while configuration takes place. I’d advise leaving this window open whilst it takes place..

Once Configuration has been successful, click Close.

WSUS Configuration
Opinions will differ here with how people will advise you set this up. We’re going to go half way through the WSUS Setup Wizard and exit. I’ve done this a few times now over the years, and this never fails..
Open Windows Server Update Services.

You will be prompted with the Setup Wizard.
Click Next

Click Next again.
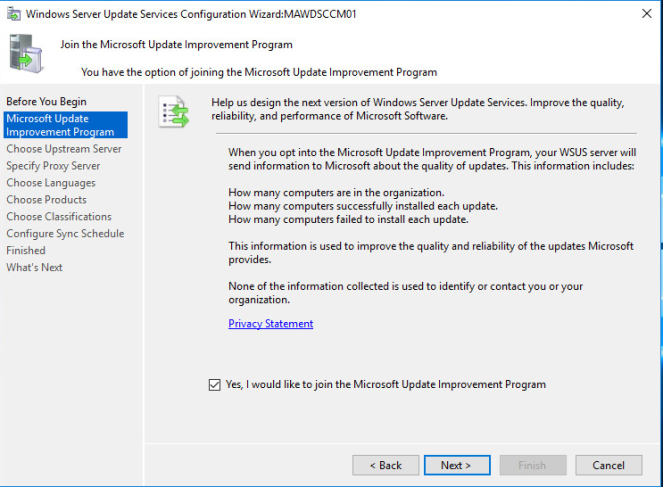
Leave settings default.
Click Next.
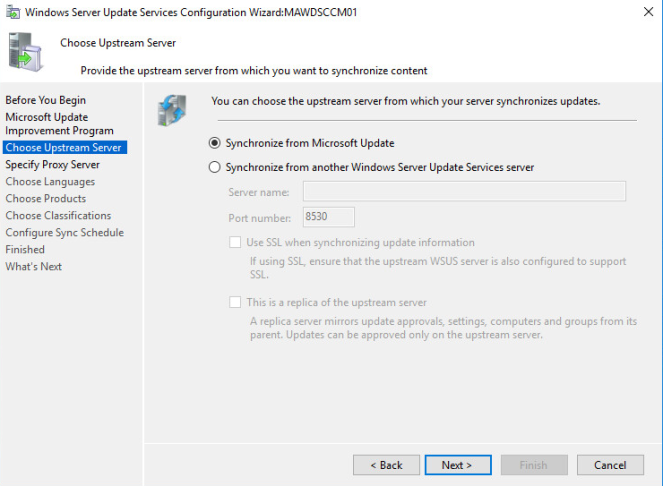
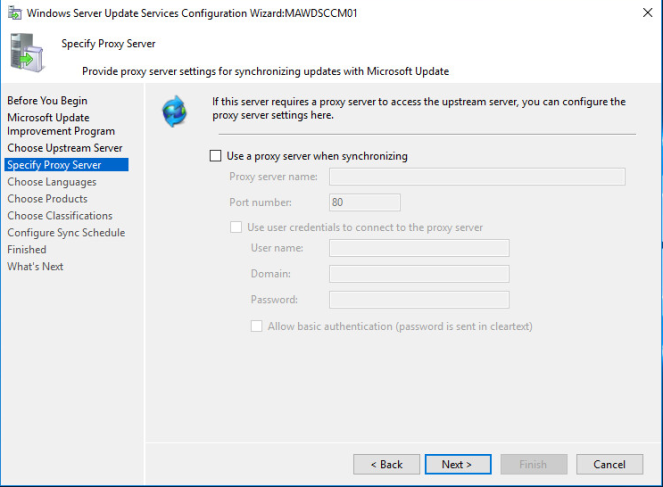
Leave defaults again (Even if you need proxy configuration).
Click Next
Select Start Connecting
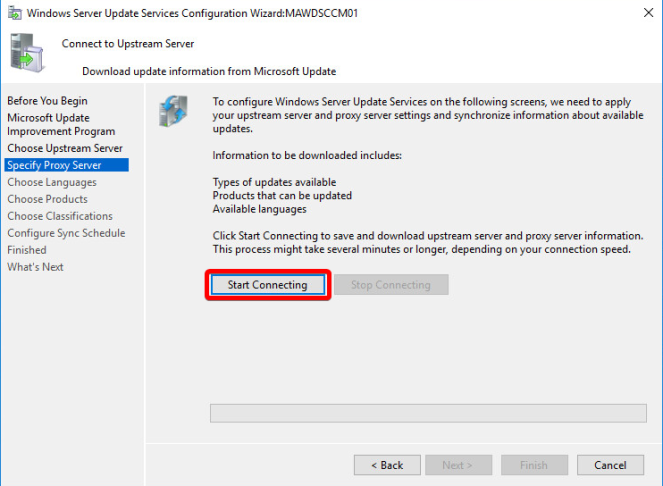
Wait whilst the connection to Microsoft is confirmed.
Click Next once complete

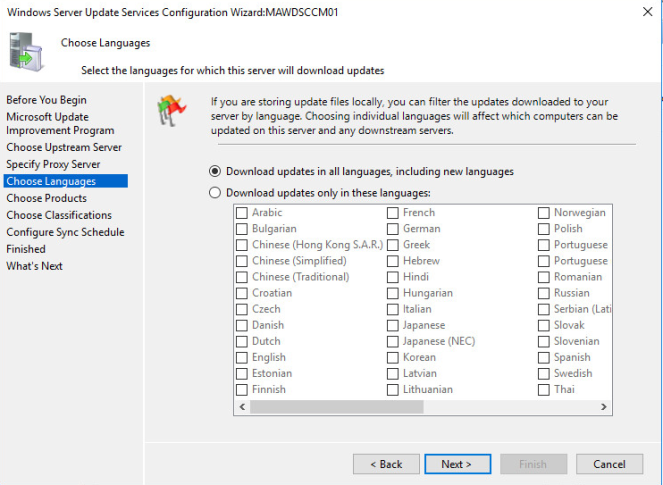
Again, leave default to Download Updates in All Languages.
Click Next.
Do not select any extra Products here. Leave everything Default.
Click Next.

Now, at the Classifications screen, leave default and Cancel the wizard.
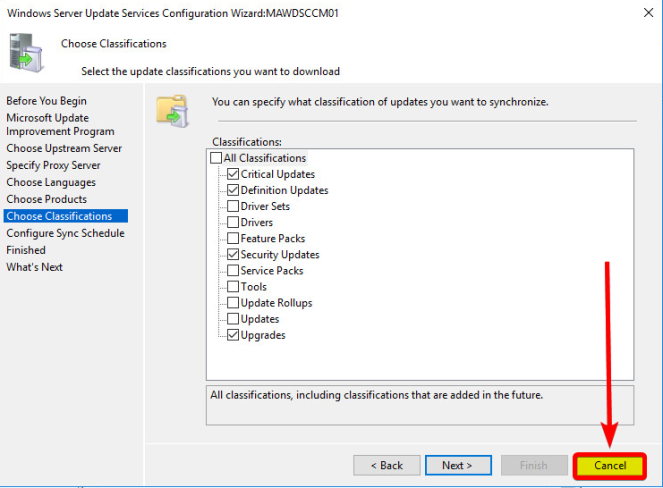
That’s all you should ever need to do in the WSUS console itself, outside of any maintenance tasks.
You should never go into the WSUS Console and change configurations in an SCCM environment.
Extra Configuration
A couple extra tweaks to the standard config ensure a successful WSUS distribution.
Folder Permissions
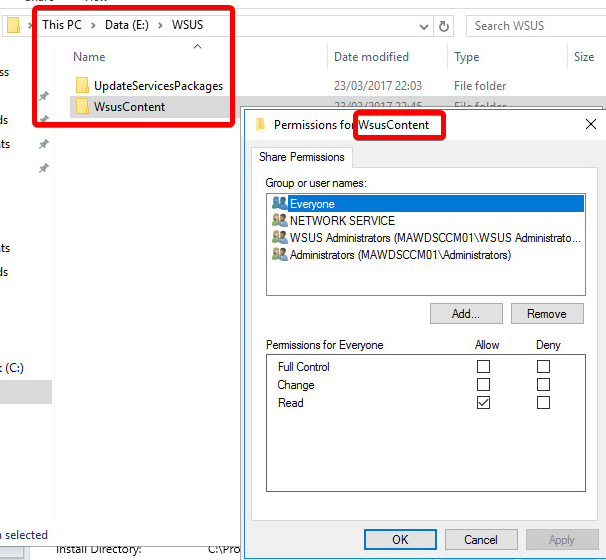
Navigate to the source directory you created earlier.
Mine is E:\WSUS

On the Permissions for E:\WSUS, add the following accounts with Full Control;
- SCCMAdministrators AD group
- Network Service
SCCM Administrators Group is an Active Directory group containing the SCCM Network Service Account, and the Machine Accounts for each Site Server.

A level down on the E:\WSUS\WSUSContent folder, ensure your permissions logically match the below. Double check the SCCMAdmins and Network Servicehave inherited down.

Ensure the share permissions on E:\WSUS\WSUSContent has Everyone as Read.
Whilst we’re here, create a new Folder..

Named SCCMDeploymentPackages
Edit the Security and ensure the Network Service and SCCMAdmins Security groups have Full Control.

Share the folder..

Ensuring Permissions are correct again

IIS Configurations
I’d advise you research these settings if you are not aware of their effects prior to setting in any production environments.
However, setting these will mostly avoid common errors you may receive on clients.
Open Internet Information Services (IIS) Manager

Select Application Pools>WSUSPool>Advanced Settings

Change Queue Length to 2000 – This is a good starting point if you’re unsure

Change Private Memory Limit (KB) to 0 – (no limit)

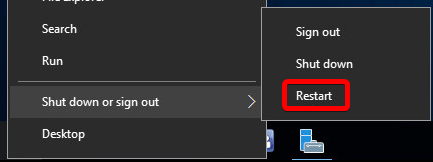
Back in IIS, select your Server on the left, and hit Restart on the right.

Alternatively, now would be a good time to restart entirely.
SCCM Configuration
Finally, now all the ground work is laid, lets setup SCCM.
Open System Center Configuration Manager
Navigate to Administration>Site Configuration>Server and Site System Roles
Right click the Site Server you wish to install the Software Update Role onto (this should be the server you’ve configured everything else onto so far), and select Add Site System Roles

Select Next at the first window

Next again

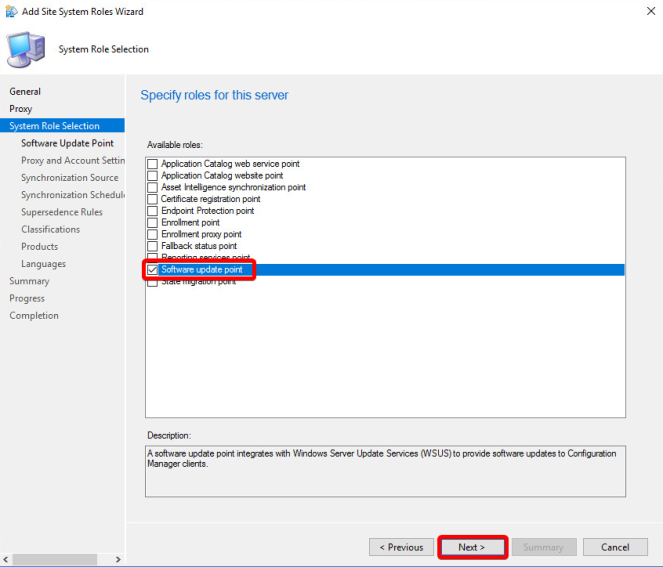
Tick Software Update Point, and click Next
Here you have two options. Assuming you are installing onto a server of at least 2012 and up (if not, why not!?), select to use ports (8530 and 8531).
Here you can also select to use SSL, and or Internet/Intranet.

Unless you have specific requirements, leave default and click Next

Leave the default to Synchronise from Microsoft Update.
Your prerogative whether to create reporting events on clients. Read the text to understand fully.

Now we need to specify a schedule to synchronise our Software Update point, with Microsoft Update.
I personally like to run my Production site’s a few weeks behind ‘Patch Tuesday’. This gives me time to fully test all updates on Development machines to ensure they work as expected and don’t cause any unexpected upset. It also gives time for the rare occasion that Microsoft need to re-release any updates for whatever the reason may be.
I’ll go into how I really do this in Part II, but for now if you’re following along, customise this schedule to run the First Tuesday of the month.
Since originally writing the above, the world has seen a vast uptake in Windows Updates being the answer to security problems. For this reason, i’m revising this statement and advise you run your sync on Patch Tuesday, the Second Tuesday of the month.
Microsoft usually release updates at roughly 17:00-18:00 UTC time, so ensure your sync happens at least a few hours after this.
I’d advise you also select to Alert when synchronisation fails on any site in the hierarchy.

Select to ‘Do not expire superseded software update until the software update is superseded for a specified period’ of, 1 month.
Tick the ‘Run WSUS Cleanup Wizard’. – WSUS Cleanups are a good thing!!

Another tip here..
Untick All Classifications.
Trust me..

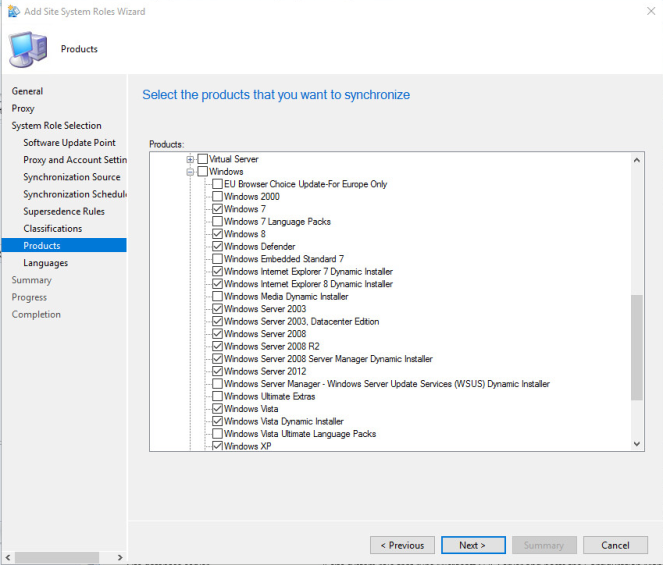
Under the Products section, leave this default.
Don’t be tempted to go through selecting everything you want to patch. Now is not the time…

Even if you wanted to, your’ll notice the lack of certain Products..
Leave it default, move on..
Select the languages you require here. Select Next.

Review the brief summary, and click Next to begin the installation.

Finally, your’ll have lots of green ticks, click Close.

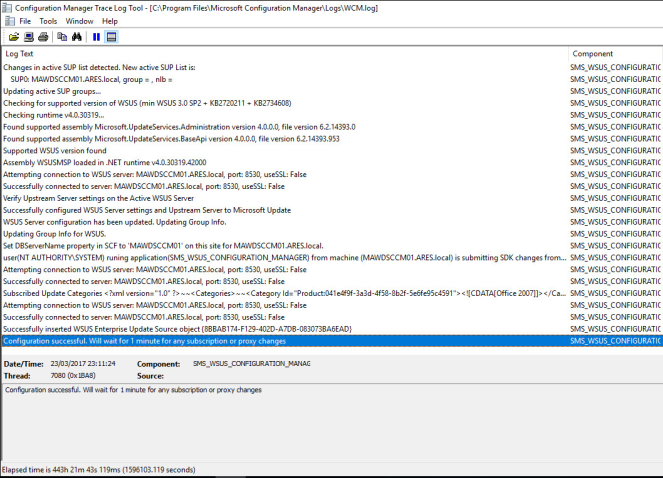
Now to review the installation. Navigate to the log below on the Site Server.
C:\Program Files\Microsoft Configuration Manager\Logs\WCM.log
Here you can see the installation of our SUP (Software Update Point). Wait for the last line ‘Configuration successful’, before continuing.. it doesn’t take long.
Back in Configuration Manager
Navigate to Software Library>Software Updates>All Software Updates
Select Synchronise Software Updates

Press Yes when prompted.

This first Sync should only take a couple minutes.
We can review its progress it two places;
In the GUI under Monitoring>Software Update Points Syncronization Status

Or for more detail, in the log file below;
C:\Program Files\Microsoft Configuration Manager\Logs\Wsyncmgr.log
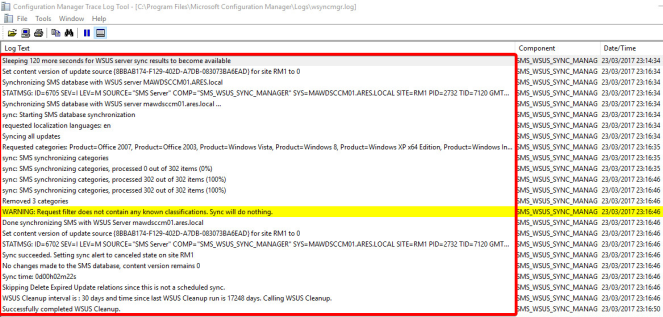
Here you can see the sync only took just over a minute. Nice a speedy. But what about that highlighted line?
“Warning: Request filter does not contain any known classifications. Sync will do nothing.”
Remember I told you not to tick and Classifications?
So what have we just done?
Remember the lack of Products selectable, notably Windows 10 & Server 2016?
Enough Questions! Answers!
By default SCCM doesn’t have knowledge of Windows 10, Server 2016 etc in its product list and we’ve first got to successfully get SCCM and WSUS communicating so it can access the full list of available products. If you would have ticked a bunch of Classifications in the initial setup then that first sync would have taken a good time longer then a minute to complete, and you wouldn’t even have the Products you want..
Now we’ve confirmed SCCM and WSUS are best buds and happy to communicate to each other, lets take another look at those Products;
Navigate to Administration>Sites
Right click your Site and select Configure Site Components>Software Update Point

Select the Products tab, and scroll down.
*tada* Windows 10 and Server 2016 elsewhere in the list are now available.
Select all Products you wish to be patching.

Select the Classifications tab and tick the ones you require.
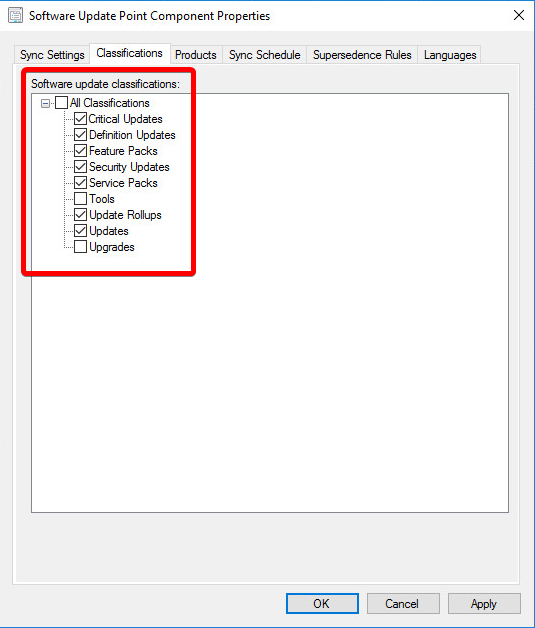
Whilst writing this post, Current Branch 1702 has been released! You have a new option here once you’ve upgraded..
Select the Update Files tab
Select Download both full files for all approved updates and express installation files for Windows 10 Express updates are still going through some development problem, so for the moment, lets skip them
Select Download full files for all approved updates
This will allow a much smaller cumulative update package to be deployed to your clients.

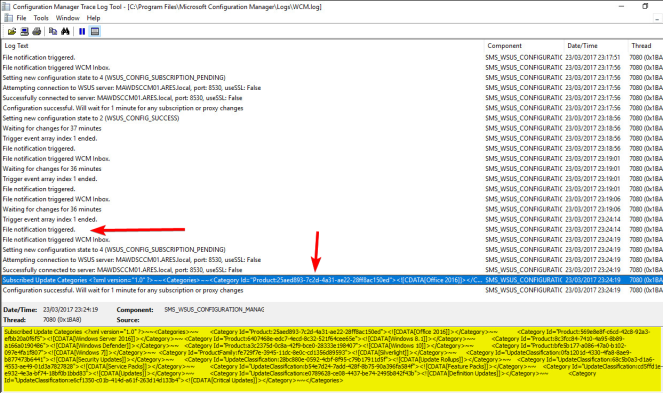
Once you’re happy with your final configuration changes (although you can of course change them again later).. Click OK and close the open window.
Once you do this, a log will be made as per below which notes the changes you have made..
We now need to Sync our changes again..
Navigate to Software Library>Software Updates>All Software Updates
Select Synchronise Software Updates
Select Yes when prompted

And again, monitor its progress..
This time, expect it to take some time.. likely at least an hour.

17 thousand updates to process and evalute..
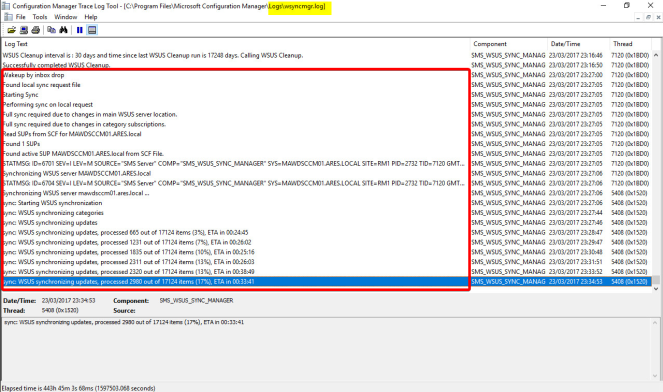
Successful sync of WSUS server:

Now to process and sync each individual update.
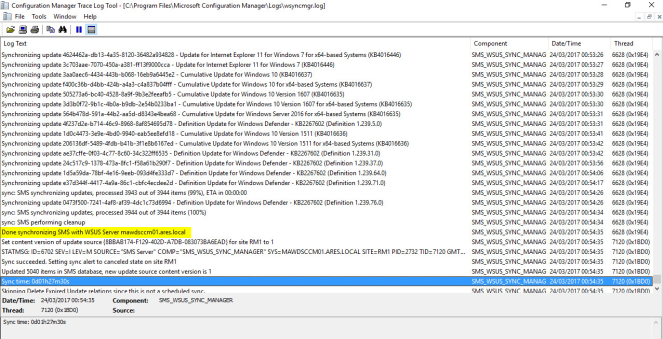
Once the Sync is complete, you can return to Configuration Manager.
Navigate to Software Library>Software Updates>All Software Updates
Lo and behold, all our synchronised updates..

Conclusion
You’ve now successfully configured WSUS with SCCM.